
 Asalam u alaikQum(peace be upon you) beautiful people ♡
I made a celebrity inspired dress from Celine Dions video Ashes which is amazing. Celine is stunning and then, of course, there is that dress. I combined two post in one that means it is a long one so get comfortable before reading (:

The fabric that I used is black Chiffon. As I am on a budget line, not going to lie I had enough to make a long skirt out of it and for the top of the dress, I used my long scarf hence why the length is a bit shorter then the actual dress. I changed a little bit to fit my style but basics of how to make her kind of a dress is the same. To cut the top of the dress it is like a Kaftan Abaya. I feel like I am repeating the same thing that I have previously shared in the kaftan cutting post. For the sake of a new project, I am going to repeat and share the detailed process.
To cut the top of the dress it is like a Kaftan Abaya. I feel like I am repeating the same thing that I have previously shared in the kaftan cutting post. For the sake of a new project, I am going to repeat and share the detailed process.
Chiffon is a see through material. You can add your lining with this dress. I already have a under garment therefore I only stitched the dress with chiffon fabric. To get started, I fold the fabric in half lengthwise, with the good sides facing together. Then I straighten and flatten my fabric out with an iron. To cut the bodice I only need to cut the neckline and mark the length and waist. Firstly, I mark the length of the bodice plus 1-inch seam allowance. Then I draw a straight line. This will help to cut the fabric straight. Next, I cut the edges in a curve shape, you can also leave it straight. I cut a v-shape on the front neckline. There is no cutting of armholes on this dress. Then I marked the waist point on all of the pieces.
 I had enough fabric to make the bottom of the dress. To make the bodice I used my old dupetta. A scarf which in Urdu is called a dupetta. To choose your scarf just make sure it is long enough to hang down close to your knees and in width, it should come up to your waist. You can keep the length as long as your full length of the dress just as hers. My scarf was not long enough, but just know that the length of the fabric will be going across your shoulders and down your arms, so the longer the fabric, the further down your arm the fabric will hang.
 If you are getting confused how to set the fabric you can watch my detailed video easy drafting and pattern making of the dress by clicking below.
Next, I cut the edges in a curve shape, you can also leave it straight. I cut a v-shape on the front neckline. There is no cutting of armholes on this dress. Then I marked the waist point on all of the pieces.I had enough fabric to make the bottom of the dress. To make the bodice I used my old dupetta. A scarf which in Urdu is called a dupetta. To choose your scarf just make sure it is long enough to hang down close to your knees and in width, it should come up to your waist. You can keep the length as long as your full length of the dress just as hers. My scarf was not long enough, but just know that the length of the fabric will be going across your shoulders and down your arms, so the longer the fabric, the further down your arm the fabric will hang.If you are getting confused how to set the fabric you can watch my detailed video easy drafting and pattern making of the dress by clicking below.
I am moving on to the bottom pieces of the dress. I repeat the process once again. Ironing and straightening the fabric out and cutting off the faulty fabric. Then I put them together, in lengthwise and pin it along as I go. This will help to cut the equal length and width of the skirt. I place it on a flat surface and finalise my desired length and width which I add 1-inch to the measurement for the hem allowance... I cut the bottom in a curved shape. To get the curve shape at the bottom of any dress, take the tape measure from top to the desired length and move along the bottom edge of the garment. I marked the waist measurement on the skirt also add 1-inch ease then joining the marks with a ruler and cutting from waist to the bottom of the skirt.
I cut the bottom in a curved shape. To get the curve shape at the bottom of any dress, take the tape measure from top to the desired length and move along the bottom edge of the garment. I marked the waist measurement on the skirt also add 1-inch ease then joining the marks with a ruler and cutting from waist to the bottom of the skirt.
Moving onto stitching the dress
First, I decided to stitch the neckline. To sew a v-neckline with buckram, put a piece of fabric and buckram on the bodice. Then iron and pin it to keep it in place. Mark your length plus width, draw a v shape. Sew, trim and iron the seams. You can also bind it with a bias tape. Watch my detailed video of how to sew a v neckline by clicking HERE. After stitching the neckline, I moved onto the sleeves which are more like batwing sleeves. Lets just say it is part of the bodice where there is no armholes and wrists to stitch just needs hemming...
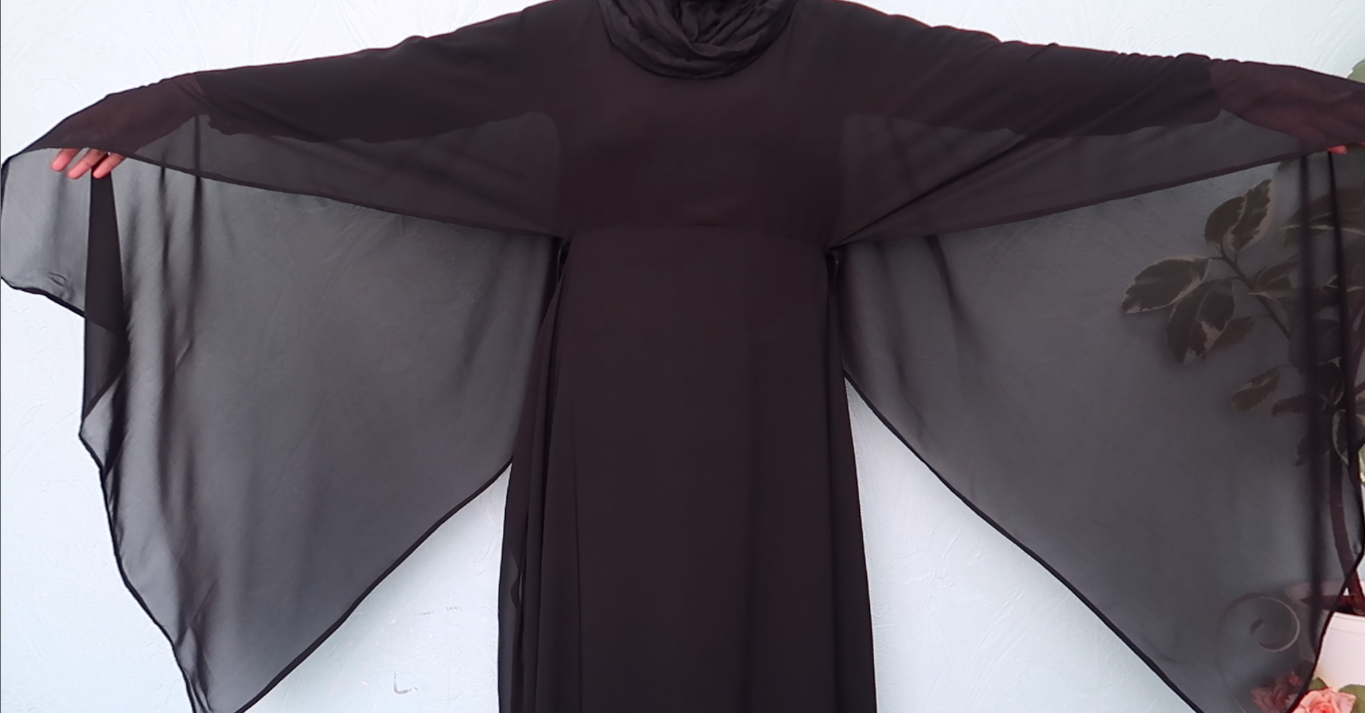 To hem the edges, I tried to sew a very thin edge by folding a bit of fabric towards the wrong side of the garment.
 Moving onto the bottom of the dress. To close up the sides, I stitch along each side of the skirt, starting at the waist to the bottom. Then I hem the bottom of the skirt.
 To sew the curved edge I fold a half-inch of the fabric towards the wrong side of the garment. After sewing the edge, I repeat the process one more time by folding another half-inch fabric inwards.
After stitching the neckline, I moved onto the sleeves which are more like batwing sleeves. Lets just say it is part of the bodice where there is no armholes and wrists to stitch just needs hemming...To hem the edges, I tried to sew a very thin edge by folding a bit of fabric towards the wrong side of the garment.Moving onto the bottom of the dress. To close up the sides, I stitch along each side of the skirt, starting at the waist to the bottom. Then I hem the bottom of the skirt.To sew the curved edge I fold a half-inch of the fabric towards the wrong side of the garment. After sewing the edge, I repeat the process one more time by folding another half-inch fabric inwards.
Now the skirt is ready I move onto joining the bodice to the skirt. I place the bodice and skirt notches, and pin them together. I finalise my waist measurement. To sew the waistline, there was no side seam of the bodice, so when I come close to the skirt side seam, I end the stitching by sliding the garment away then I sew the waistline. To finish off, I iron the seams and there you go. I am in love with this dress. This is perfect for modest wearing. I liked how the top just hugs your body, how it hangs down your arm kind of like a kaftan but the bottom of the dress gives a curved look. I hope you like it as much as I do.
 You can also watch my detailed video on youtube or click below to watch (:
To finish off, I iron the seams and there you go. I am in love with this dress. This is perfect for modest wearing. I liked how the top just hugs your body, how it hangs down your arm kind of like a kaftan but the bottom of the dress gives a curved look. I hope you like it as much as I do.You can also watch my detailed video on youtube or click below to watch (:
No comments
Post a Comment
If you have any doubts, please let me know.