♡ This is one of my requested project from Instagram follower (or I say kind woman) ♡
I was very excited to make this, firstly I love to create something new from old and secondly knowing that someone is waiting to read this (:
Pre warning this blog post is going to be long but you can quickly check it out how it looks in my style category - Lookbook or you can click on it here "Look book". 
Asalam u alaiqum (Peace be upon you) Beautiful People ♡
As you already know from caption. This is a requested project of saari into a dress. Few months back I made exactly same dress which you can read here - "From old to new Dress 1"(quality of those pictures are not good) I upload on instagram and few months later this kind woman message me and requested if I can explain how I made it. Explaining only in words is really complicated for me so I decided to give a go by making a post here. It will be a bit easier for her to understand by looking at the pictures and I got a new dress that I recently wore at wedding occasion. Therefore, shall we get started?...
Firstly, I will show you a picture of how saari actually looks like. I have my old picture wearing it but I am not wearing a head cover (Hijab) in it. That is why I cannot show you the picture. This is how a saari looks like... It is a consisting of a very long piece of thin cloth wrapped around the body, a dress worn especially by South Asian women. Is not she looks amazing.
I undo the sleeves because I do not like to wear half sleeves in public then I unstitch the waist of saari (bottom piece) once I open up the pleats it give me a very long material to work with...

Now we have a long material to work with. Lay the material on top of each other so that they are even (making sure that we only have to sew from one side, you will understand when looking at the pictures)

Take your measurements. Use a measuring tape to find the distance around the widest part of your hip, smallest part of your waist, and the total length (carry in mind that your blouse waist is the same as your skirt waist) To find the length, use the measuring tape from your hips (or from top of your blouse) to the desired level on your legs and add one or two inches extra for seam allowance. In length you will only need seam allowance to attach the blouse with the skirt. My bottom of the saari is cover with a gorgeous beads pattern...
Here is the thing if you want your dress to give a bit dragging kind of style from the back than you need to cut it the same way in the picture below. However, if you do not want this look then you need to cut a bit rounder shape from the corner of the saari bottom.
I put the L shape ruler, to get the dragging style' you need to cut from the outer side of the ruler. To get the round shape' cut from inside of the ruler straight towards the end then go along the marks upwards. This is an idea given below...
Cutting off the extra fabric from which we will make new sleeves and a cushy top (yes a top that I name it too he-he)...

Sew the side seams...leaving 1-inch seam allowance...

Skirt is ready now need to attach it with blouse...

Unstitch the blouse from bottom...
 If you are having trouble keeping your fabric flat, use an iron...
You are going to start sewing from the front. As you can see in picture below, I made a crease with the iron on bottom skirt so it will leave me a starting point. Mark your front blouse middle part. Put them together. This will be your starting point to sew, all the way around...


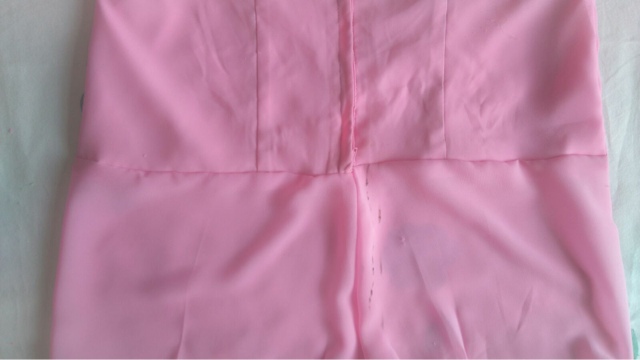
Your bottom skirt seam should meet your blouse zip/seam...

Cutting the extra fabric to give cleaner look...

The front look...

And that is how the back looks...

It is time to make new sleeves (you can skip this if you are happy with sleeves made on blouse)...

I have cut the border of sleeves to attach them with new sleeves...
 Border for sleeves...
An important thing to remember while cutting the left over fabric for sleeves you need to cut the cushy top also. You can find the information below.
A fabric for sleeves...

I am using same size of my previous dress for sleeves, this is just an easy idea to take measurements but not professional (soon I will upload a post - How to take your dress size measurements on a piece of paper and cut into a shape for life time)

Ironing and putting marks on fabric, really helps in cutting...

Here I am attaching sleeve border (with white lining) I am using white lining because it will stand out like whitey pinky colour not pinkish (I do not know why I write that he-he) You can use pink lining or none...

I am sewing this on a wrong side of fabric so when I turn it over it will give fine look from underneath as well...

Inside of the sleeves...

Front side of the sleeves...

Sew on the line of your measurements mark, cut the extra fabric and sew them with the blouse...

My Cushy Top
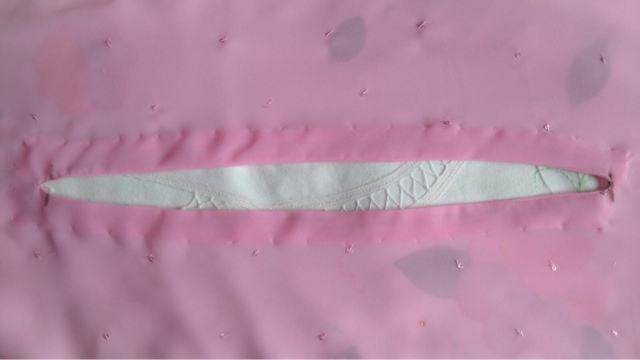
Cut a fabric into square shape (size depend on your own liking) in middle I made a cut about 14-inch long (measure your own shoulder length, making sure when you put your head thru it stays on your shoulder) also cut the pattern to secure it...

Here is the same fabric piece...

Pattern to secure the cut we made in cushy top, you need to cut a same size in pattern too.
Other thing is the border for one side of cushy top because the loose end of a ready-made saari has three border sides. We cut a square shape top, which gives us four borders. As we unstitch the pleats of saari it give us a very long material. You can take off the border from it. Exactly like, I did with sleeves...

Put the pattern on right side of cushy top and sew along the cut we made (I also sew the ends of pattern first, to give cleaner look)

This is how it looks from the back...

Now you need to turn the pattern inside out and flatten it with iron...

Hand-stitch along the sides...

This is how the front side look...

sewing the border on cushy top same way that I have sewn sleeves...

Turning border on right side of cushy top and sewing with machine...

Back look...

Front side look...

I also made my neck cover pattern with left over fabric...

There you have it, from old saari into a new dress...I hope you like this idea. Let me know your thoughts and thanks for the kind woman who request this I had so much fun by making this post. It was not easy but I did it (: x!
More details How it looks, click - LookBook
A ♡ O


No comments
Post a Comment
If you have any doubts, please let me know.